Tuesday, November 24, 2015

Bikepacking the Manistee National Forest: Part 4

The great thing about laying out under the stars at night is awaking to the sunrise the next day. After a night of heavy dew we needed every bit of warmth we could get to dry things out a bit before packing up and hitting the road. It was a pleasant morning to sit next to the fire and river and enjoying a hot cup of coffee along with some oatmeal laced with fruit and nuts. This day would be very different from the prior day in that we would start out with a few miles of singletrack and that would be it for the rest of the trip. The plan was to head back up the hills and into the countryside north of the river for a bit, utilizing seasonal and secondary roads in a round about way to get to Mesick where we would provision ourselves for the evening and next day.


Rousing ourselves for another day of adventuring!


Tyler cruising the gravel road up to Mesick


All stocked up

Mesick is a great little town to stock up in mid-ride or even if you're just up to ride the NCT for the day. The Mushroom Bar has tasty burgers, libations and other fried goodies. There's a nice grocery store next door to the bar to provision for any adventure and a few other spots in town for most any need. After departing Mesick we began our trek southeast towards the highest point in the Lower Peninsula dubbed Briar Hill. From Mesick to Briar hill one can expect to gain about 900 feet of elevation in some of the sandiest two tracks around. The "Mesick Mountains" are a popular off-roading area among Jeep enthusiasts and as such the two-tracks can range in conditions. We approached Briar Hill from the northeast and made the long ascent up forest roads to the small parking area at the base of the now closed two track approach. There is a very faint path that winds the remaining distance up to the summit. Very little denots you're on the top save a few footing from and old firetower and a missing USGS marker.


Forest road climb


Firetower footing and missing USGS marker


Resting atop the summit

From Briar Hill we meandered through the national forest roads back towards the tiny town of Yuma for a short snack break before heading back up the ridgeline. The numerous forest roads in this area make for many options on routes and terrain. We chose to follow a route from Yuma to Ridge that i located as a Strava segment figuring that it must be legit since others had ridden it. The route hit some nice sandy areas that our Salsa Beargrease fatbikes tackled with ease, and as we got further up the roads brought us into mature hardwood forests with little undergrowth and stunning views. It felt as though we were riding through a church of sorts and the peacefulness was on par. From the ridge we headed back out to more modern dirt roads and bombed down into the town of Harrieta for a quick breather.


Enjoying the cruise downhill from Briar Hill to Yuma


Helpful signage


Two track cathedral

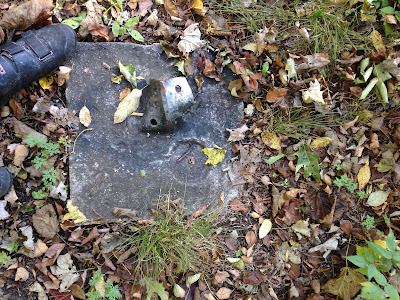
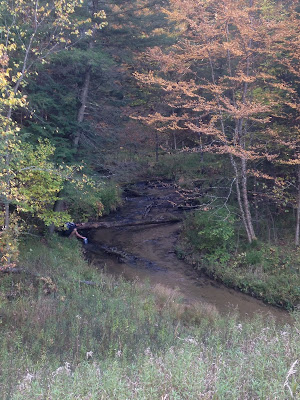
The road south out of Harrieta may be paved but at 295ft of elevation and 5% grade it knows how to burn a few matches. Loaded down on fatbikes the long climbs require a bit more patience and metering out of power, kind of like piloting a diesel freighter versus a 4 cylinder import. The punishment proved to be worth it with some pleasant views from the Caberfae overlook tower. The paved road was short lived as we departed once again to find more forest roads and rolling terrain. As our route meandered further south and east we began chatting about where to camp and what we wanted camp to be. Both of us agreed it would be preferable to be near a creek or river to wash up in, and we were willing to sacrifice views for that accommodation. On top of needing a refreshing dip we were also in need of a water source as our stores had dwindled rapidly through the tough terrain. Magical things can happen when you're out in the woods on a grand adventure, and i believe the next sequence of events was in that category. Being tired, thirsty and running short on daylight our indecisiveness and lack of a discreet camping location left us in a bit of a dither. Without a firm decision i figured we had best just get some water so we could check that off the list. As we cruised down the county road i spotted a earthen bridge crossing indicating the presence of a water source. Tyler wandered down to the creek with he filter to obtain some fresh drinking water and i followed shortly after a snack to check the creek out. As i was walking down to the creek i spotted a railing in the woods and as i followed it with my eyes i saw what looked like a small cabin. Upon further inspection there was an Adirondack shelter of sorts with a fire pit and old stairs leading down to the creek it appeared we came across a decommissioned campground or access site.


Caberfae lookout


Forest service roads


Water stop


Seemingly inconspicuous creek


Whoa, sweet shelter!

Leaving some things unplanned can turn out to be pretty sweet sometimes, and this case was no exception. Stoke level was high and it was a no brainer to settle down at the shelter for the night. After a quick soak in the creek and collecting a bunch of firewood we settled down for the evening with the creek trickling below and the stars gleaming above. Day 2 was by all accounts a success!


Panoramic view of our digs


Downing some grub by the fire


Sweet view overlooking the creek


Fall colors

Keep your eyes peeled for the final installment of this journey!


Wednesday, November 11, 2015

Bikepacking the Manistee National Forest: Part 3

After enjoying a pleasant evening around the fire and sharing a few libations we were up with the sunrise to get a start on our trip. Sleeping next to moving water is always soothing, and waking up next to the Little Manistee River was a treat. Having camped in a relatively low area there was a heavy chill in the air, but the sun rising was doing a fine job to warm things up and drive the fog out of the low lying areas. The nice thing about starting our trip at this location was being able to wake-up, pack the bikes and roll down the road. There was no need for relocating the car which is always a bonus. The route i had laid out started us off on relatively flat gravel for the first few miles which was a welcome way to warm up the body and mind. We paralleled the river for a while and made our turn north on 9 mile bridge just south of Big M. Looming before us were the Udell Hills and ample singletrack. To further warm us up i had us turn onto the NCT that heads into the Big M trail system. From there we followed many of the popular trails within Big M up to Capper's Corner for our first vista of the trip.

Bivouacking on the Little Manistee River


Warm-up gravel on Riverside Dr


The overlook at Capper's Corner in the Big M trail system

The many hills along the route to Capper's Corner had us well warmed up and after adjusting clothing we were on our way, descending down to the warming cabin and turning back into the woods for another hefty ascent. For the route i tried to pick out as many high-points and overlooks as possible, and the next stop along the way was Firetower Hill. Despite being loaded down Tyler put his VanHelgas to the test and power his was up to the top of Firetower. This brought us to our first "adventure section" which was a long unused two track the tended in the direction of the NCT. I like to throw some sections in that aren't sure bets, sections that may or may not be passable, just to add an extra bit of adventure and uncertainty into the trip. Luckily for us it was a somewhat easy to navigate section and we rejoined the NCT. As we departed the Big M trail system and journeyed on towards the Manistee river the terrain was mostly rolling to flat for a nice change of pace. Once we arrived at M-55 we took several dirt roads and two tracks over to High Bridge which was to be our safe crossing of the Manistee River. Once across the river i routed us onto a snowmobile/forest service road that leads up to a nice powerline clearing high above the river. This is a nice area to take a break and enjoy the views despite the man-made intrusions. I tried to utilize as many Forest Service roads as possible to avoid more frequented roads and maintain a pleasant wilderness experience. We weaved our way through the forest land and eastward to the next ridable section of the NCT which begins at Dilling Road.


The infamous Firetower in the Big M trail system


Random two tracks near the Manistee River


Power-line overlook not far from High Bridge road

From Dilling Road all the way to the Marilla Trailhead near the Hodenpyle Dam it is permissible to bike on the NCT. To be clear, bikes are not allowed on all sections of the NCT so this is a nice bonus to be able to parallel the river on singletrack through the rolling terrain. The section from Dilling road to Red Bridge (North Coates Hwy) is less popular than the section from Red Bridge to Marilla Trailhead, but no less enjoyable to ride. The NCT winds its way up and down the large bluffs that skirt the Manistee river and offer quite a bit of elevation gain along the way. We passed few other trail users on our journey to Red Bridge, winding our way through the mixed hardwoods forest. Upon reaching Red Bridge we made the decision to journey onward and not stop down at the river access. For reference, the Red Bridge river access site has a few campsites, ample parking, a vault toilet and a hand pump for potable water. Heading northeast on the NCT from Red Bridge we began to cross paths with many hikers and day users. In the spirit of the trip we took our time and traversed the terrain in a safe manner as to not run over pedestrians or cause a spectacle, frequently stopping to take in the vistas as they presented themselves. I highly recommend this section of trail and it's truly a gem in the middle of the state! Near the end of this section is the Marilla Trailhead and a fantastic view of the river from a couple hundred feet above. This made for a great last stop to discuss the final section of the day and count down the miles to our bivy site.


Tyler making short work of the NCT from Dilling to Red Bridge


Eddington Creek crossing shortly lies right before the ascent to Marilla TH


The awesome overlook near the Marilla TH


Moss guides the way along the NCT

Upon arriving at the Marilla Trailhead proper we turned onto Beers road and let it rip downhill on the first pavement we had ridden in hours. It's always awesome when you can end a days riding with a grin inducing descent and roll into camp! After a brief stop to check out Hodenpyle Dam we headed downriver to one of the many hidden gem campsites along the Manistee River. This particular one happens to be an old homestead site with some weather worn stairs down to the river and a nice sitting log and fire pit. We arrived just in time to enjoy the last few hours of daylight and rinse off in the ice cold rapidly moving water. With no known poor weather on the horizon we opted to bivy out in the open once again to enjoy the evening which makes setting up camp a breeze! Harvesting down and dead wood proved not to be an issue at this lightly used site and the evening wore on with tales from the trail, discussion of the days the laid ahead, and general conversation. The roaring fire kept the chill at bay until the time came to bed down for the night. With the stars gleaming overhead it was a pleasant night to drift off burrowed into a down cocoon.


A horseshoe bend in the Manistee River


Prime parking


Bivouac site in the meadow


Libations for a pleasant evening

Stay tuned for Part 4 covering the next day of travel!


Wednesday, November 4, 2015

Bikepacking the Manistee National Forest: Part 2

Bikepacking serves me well in many ways; I get to satisfy my camping and exploring urges, i get to crank out some miles for "training" and i get to bond with good people on top of it all! When planning a good bikepacking trips it's important to rank what's most important on the trip, especially when you're bringing others along with. What's the skill level/fitness of your co-adventurers? What bikes/equipment will you be bringing? Are you using this as a training trip or is it a vacation to relax? What kind of scenery/terrain are you after? What "resources" do you need at your campsites (toilet? water? electricity? brewery?). It would be a shame to take the opportunity to have a great time and bungle it up by making the route too hard or choosing terrain that isn't suited to the bikes you're riding or trying to force others to death-march from dusk til dawn. Planning to me is half the fun, so i like to keep an open dialogue with the people i'm traveling with to determine what the trip should be. Once i've sorted through these questions then i begin making my route! (Note: i know this sounds like a lot, and yes it's fine to just say "hey let's go bikepack!" and take off, just trying to help folks avoid some pitfalls of past adventures).

My favorite bike to use bikepacking is a fatbike, you can ride through just about anything, it carries the weight well, it's stable when loaded, and they're just plain awesome! On this past trip both Tyler and i planned to use out fatbikes so pretty much any terrain was fair game, and with us both being adventurous and fit fellows the sky was basically the limit. A few things to consider when planning daily mileage is what the average pace might be and how much daylight you've got to work with. Personally i don't want to race out of bed in the morning into a damp chamois, pound pedals for 12 hours then roll into camp in the pitch black. It's nice to plan an hour or two in the morning to get your wits about you, have some coffee and a hearty breakfast and thoughtfully pack for the day ahead. I've found that in general the pace i end up covering is about 10-11 miles per hour regardless of the trip, so i plan on that. Rolling into camp with a few hours before sunset is always a good idea in case your desired camping area doesn't pan out, plus it gives you some time to clean up, setup camp and enjoy an awesome sunset if weather permits.


With our trip occurring in October I figured we'd depart camp between 9-10 AM and want to be done between 4-5 PM so 50-60 miles a day seemed pretty reasonable. Since we planned to carry a water filter and everything we needed the only stipulation for camp would be to be relatively close to some body of water. Over the years i've accrued many maps of wilderness areas in Michigan, but nowadays you can find pretty much everything you need online. The National Forest service map on the Manistee National forest is a great resource to start with, it's large and has many layers. The campgrounds are marked and if you search them online you can find the info on popularity, number of sites, facilities, etc.. Another resource i really like is the National Forest MVUMs (Motor Vehicle Use Maps). These are a great resource for all of the forest roads the cover the area (and there are many) as they show the roads and their corresponding number (typically 4 digits). MVUMs also have things like trailheads and campgrounds marked. If you're really getting adventurous you can get topo maps from a number of resources, personally i like to just download the ones i want from the USGS and print the areas i'm interested in on 8.5 x 11 in 1:1 scale.


With the maps in front of me i set out to determine which camp sites or areas in the national forest would make good places to hunker down for the night. For our October trip i knew we wanted to ride some singletrack, so i figured we would hit Big M along with the sections of NCT that allow bikes. The forest roads make a great option to avoid busier roads and further immerse yourself in the wilderness so i tried to link as many together as possible. Since we we agreed on making it a "challenging" route i looked for high points on the topo maps and overlooks to provide ample elevation. While it's fine to carry all of the food for the trip i figured since there's a few small towns around i'd route us through one for a re-supply to keep weight down and have access to ice cold refreshments. As I've mentioned before, i like to plan my routes out on Strava because it has the heatmap layer which other programs don't. This is a good way to see what locals are riding (or avoiding). You can also toggle the Strava segments on to see where some good climbs might be!


After the route was all planned out i sent it over to Tyler for review. It's always nice to let people see the route beforehand so they know what they're signing up for and it makes it harder for them to hold it against you later haha! The plan was to meetup after work on Friday, drive the 2 hours north to the starting point and camp out by the car. I chose a start point that we could both camp at and park the car for the entire trip which helps save on time shuttling around. Another good reason for choosing the Manistee National Forest is that it's the closest area to Grand Rapids that others a large expanse of state and government land to use along with many camping options, and it's less than 2 hours away. It was nice to arrive to camp with some time left before bed to enjoy a campfire, chat about the next day, have a few beers and transition from work mode to adventure mode. As the night faded the coyotes came out and hollered for quite some time (and continued to do so the entire evening) which made it feel even more remote and wild. The night before a trip is kind of like being a kid before Christmas, i often find myself wishing the time away so i can get to the next morning!

Stay tuned for Part 3!

Tuesday, November 3, 2015

Bikepacking the Manistee National Forest: Part 1

A few years ago i was struggling with balancing two passions of mine; backpacking and bike riding. When i moved over to Grand Rapids i met back up with a buddy of mine, Chris, and we began backpacking and exploring all over Michigan, Canada, and beyond. Shortly after that time i also began getting more and more into the cycling scene and found myself signing up for races and spending much of my free time during the week riding around Kent County. It was only a matter of time before the two began to conflict and i was forced to make trade-offs, as many of us do, with our hobbies and the limited time that working life allows. Part of the inspiration to go bikepacking came from a new bike i had acquired over the winter, the Borealis Yampa Fatbike! Riding a fatbike had turned many mundane training rides into exploratory session all around the area. I think it was part desire to push the bike and part excessive fun that spawned many an urban and countryside jaunt.

Skip ahead to the following spring and Chris and i found ourselves plotting our next adventure. Our standby location for quick weekend trips has always been the Manistee National forest, especially the area surrounding the Manistee River stretching from Udell Hills to Mesick. It's a prime area for all sorts of adventures; Big M trailhead, North Country Trail, Manistee River Trail, hundreds of miles of Forest service roads, National forest campgrounds, National Forest land, gravel roads, riverside campsites, and the list goes on. Wanting to get training miles in but still spend a good weekend out in the woods i proposed the idea of bikepacking to Chris and some internet links of what others had done along with gear setups. Before we knew it, both of us were sending photos back and forth of the progression of our bike setups and route plans. On a not-so-fine weekend in May that year we covered a 100 mile loop from Manistee to Mesick and back, and that was the first bikepacking trip we took.

Fast forward even further to this past October of 2015, several bikepacking trips, fatbikes and gear iterations later. Tyler and I had been talking about a bikepacking trip since early in summer, but with a busy racing schedule the time just wasn't there. As fall came upon us we re-opened discussions and began to lay out a plan. I always find that the critical first part is to pick a date that works for all parties involved and set that in stone so to speak. Once you have the number of days and time-frame laid out, then you can asses how much ground you want to cover, the overall difficulty of the trip, location, logistics and so forth. We elected to take Monday off to make it a 3-day weekend and depart Thursday after work to maximize time in the woods. I find that when i can, i prefer to travel after work the day before the trip is set to actually start. It's nice to just wake up where you want to begin and not waste good daylight driving around.

For this particular trip i had just received my new Salsa Beargrease and the stoke level was high on getting it out for an epic maiden voyage. I changed a few things out to make it bikepacking worthy; swapped the front chain-ring to a Wolftooth elliptical 30T for extra climbing prowess, ran 45NRTH Husker Dus for low rolling resistance and weight, raised the stem up a few spacers for a more upright position aimed at long days in the saddle, swapped on a saddle that's not just straight carbon. On past trips i had just run a cantilevered seat-post rack with a dry-bag lashed to it, but this time i borrowed Jenny's Revelate Designs Viscacha seat-bag to try it out. On the frame i ran a Revelate Designs Tangle partial frame-bag , a Gas Tank bag on the top tube and one bottle cage on the seat tube. Out front on the handlebars i used a Outdoor Research dry-bag with ladder webbing on the side and simply lashed it to the bars with two straps. On my back i carried a hydration pack (10 liter gear/ 3 liter water).

When it comes to camping gear i'm fortunate that the many years I've been backpacking and exploring have left me with a plethora of options for just about any situation. There's many schools of thoughts on just sleeping or cooking gear, let alone the whole camping/biking package so i'll simply give a rundown on what i use and you can take from it what you will. When it comes to shelter my go to setup is typically a 8' x 10' SilNylon tarp with tie-outs along the perimeter and in the center. I like a tarp because it gives me a view in the evenings and mornings, it's flexible and you can set it up many ways, and when it's nasty out a couple folks can chill under it and not be condemned to a bivy sack or tube tent. For cooking i usually just carry my Snowpeak pocket-rocket style stove with a small fuel canister as it's light, quick, and low-maintenance. For a pot i like to use a medium size coffee percolator which i have thrown out the "guts" so it's basically just a pot, it's sturdy and aluminum, cheap at REI and it withstands cooking on a fire to help save fuel when there's already wood burning. Sleep gear varies throughout the year, but in general i use a layering approach for flexibility. Above freezing i generally carry my Mountain Hardware Phantom 45, a nice thermo liner to adjust the warmth, a Therm-a-rest Neo-Air sleeping pad because it's super light and they come in a variety of R-values, and a stuff sack i keep clean to throw clothes in and use as a pillow.


Just like regular old backpacking it matters how you load your carrying gear. Things to keep in mind are; center of gravity, weight distribution, delicate equipment, ease of access and weatherproof-ness. How you load the bags on the bike will affect how it handles, and the different bike/bag combinations will require different loading techniques. The majority of my backpacking is on a fatbike and the routes tend to have gravel, singletrack, sand, and pavement. I like to place lightweight but bulky items on my handlebar to help reduce the amount of effort i have to use to steer but also use that "open space" to it's maximum benefit. Typically my sleeping bag, sleeping pad, tarp and extra clothes end up on the front. In the Gas Tank bag i like to store my phone for photos, food, and battery pack. In the frame-bag i like to keep my headlamp, compass, multi-tool, pump, tubes, water filter and other dense items. In my seat-pack i like to carry my camp food, cookware, the remainder of my extra clothes, fire starters, and maybe a beer or two. On my back i like to carry my daytime clothing layers, lunch, extra snacks and maps in an easy to reach pocket.

Stay tuned for Part 2 where i'll get into details of the journey itself!